Linux RAID
These days Linux is getting trending again. I don’t know why really, maybe the Raspberry PI project, for automation and orchestration Linux comes in handy, or many other reasons. Fact is that everybody wants to learn and master Linux. I also found interesting how people is sharing extensive documentation on how to create a DYI NAS using inexpensive hardware+Linux. Point here is that 99% of them only share the media sharing part, no matter it is using Samba or NFS, and they often forget the building blocks of any storage. Of course, if the end user cares a bit about the data they store, they would love to have at least, and also inexpensive software RAID configuration.
For those of you who don’t know what RAID is, here. What all this means? Well, we will have multiple copies of our data chunks scattered all over many disks, hence getting data redundancy in case of failure. Of course, dig deeper in the RAID matter. Not all configurations perform the same, behave the same and protect the same. Don’t say I didn’t warn you.
For this post. This wants to be a quick’n’dirty cheat sheet about software RAID with Linux. We will from the disks connection and detection, to the mount point and maitaining the tatus across reboots. For the media or file sharing, search around Internet, there will be plenty of information.
So, let’s connect a bunch of disks to our Linux box and see what happens:
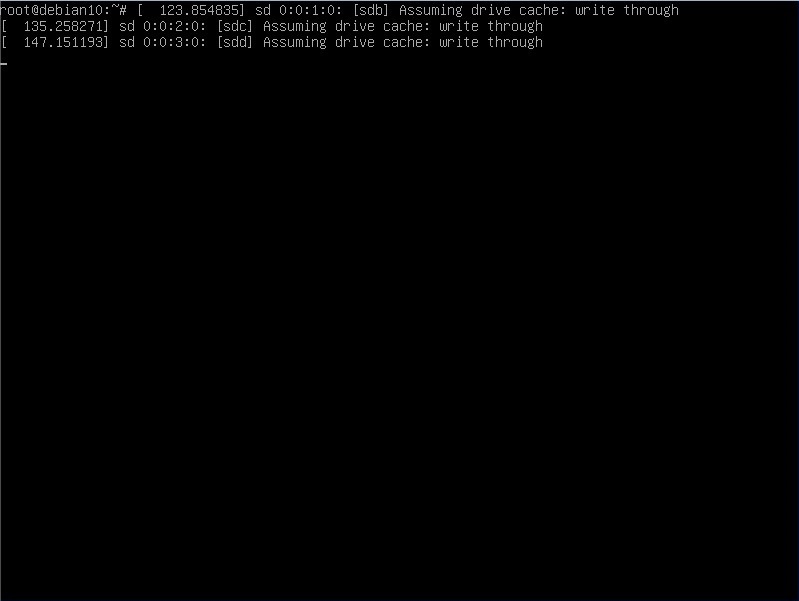
Which means we connected 3 HDDs to this machine. It detected them as sdb, sdc and sdd drives. Of course we will use these. Next step is to create primary partitions on them:
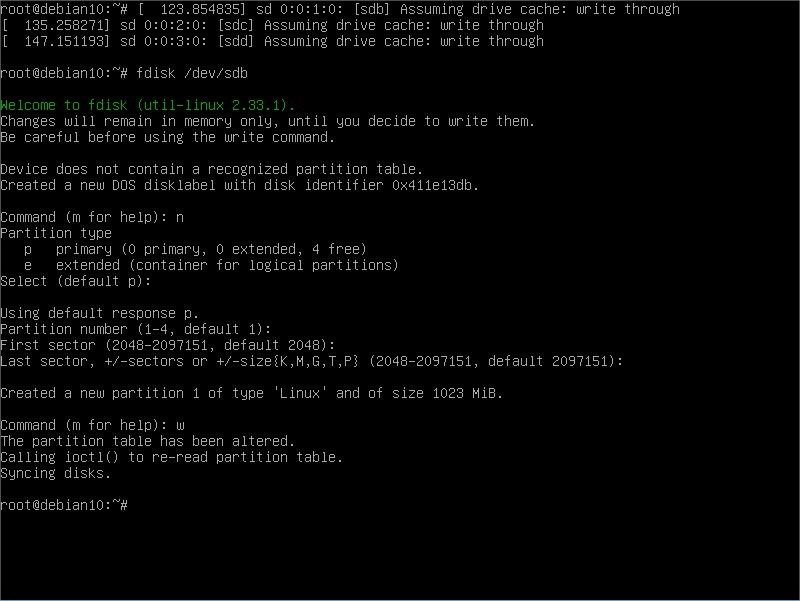
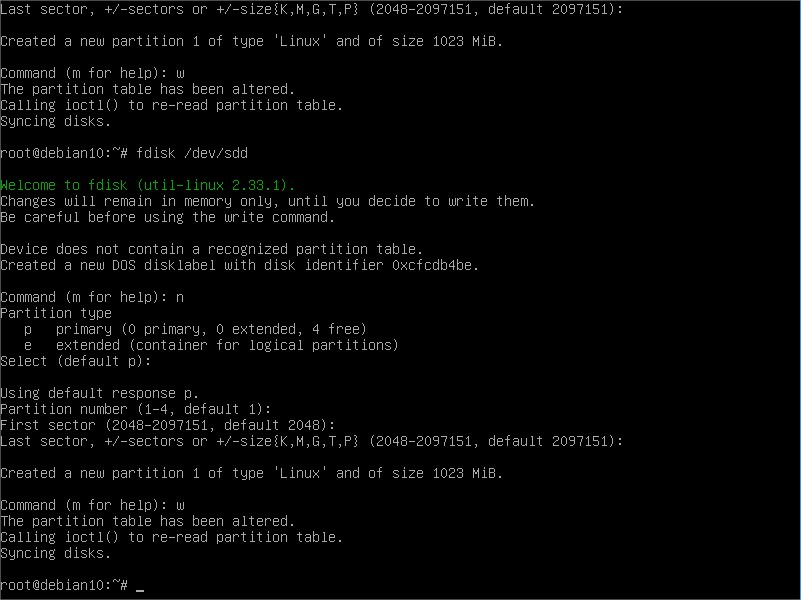
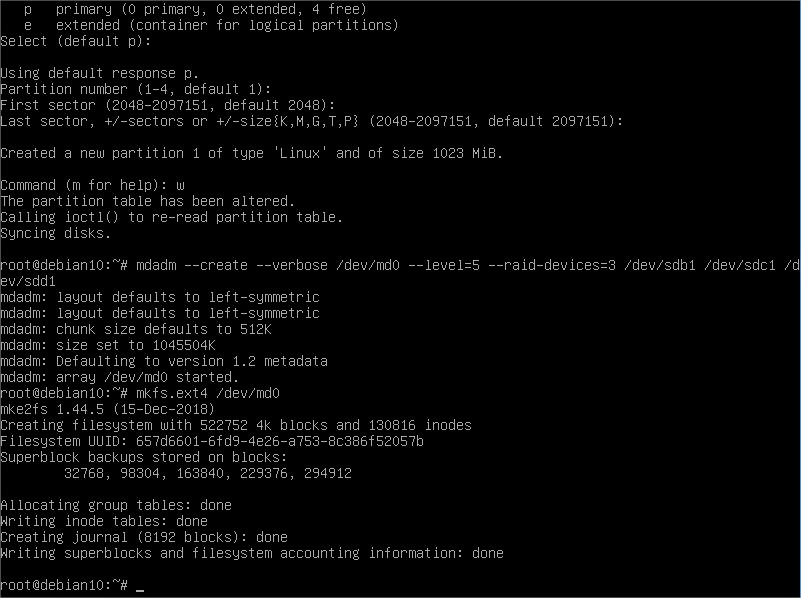
Using fdisk tool, we created one primary partition in /dev/sdb , so we will refer to it as /dev/sdb1 from now on. Next, repeat for the other 2:
Our three disks are ready to go. Now we need to create the virtual device that will tie together these 3 disks, along with the RAID mode of our election. Like so:
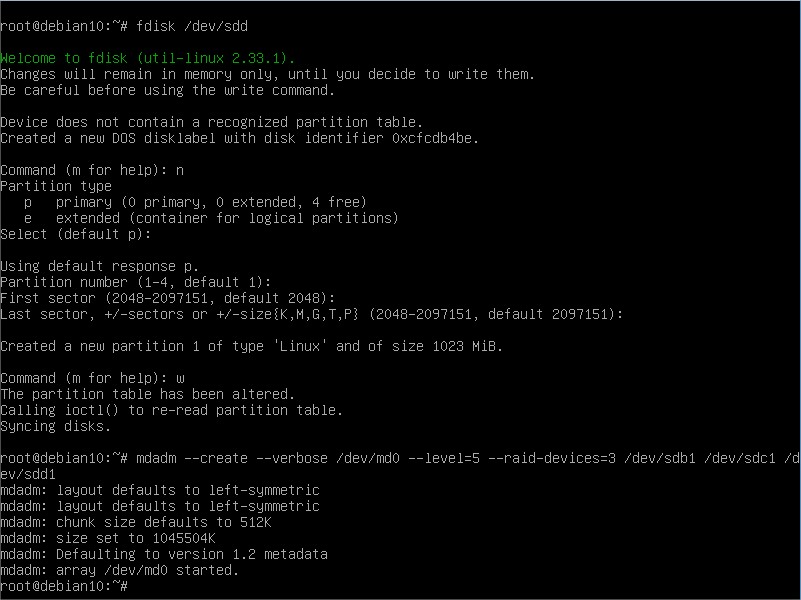
Now we have our RAID 5 configured using these disks. Now of course what we have is just a block device. We need a filesystem on it:
A mountpoint maybe? Good idea if we want to use it, right?
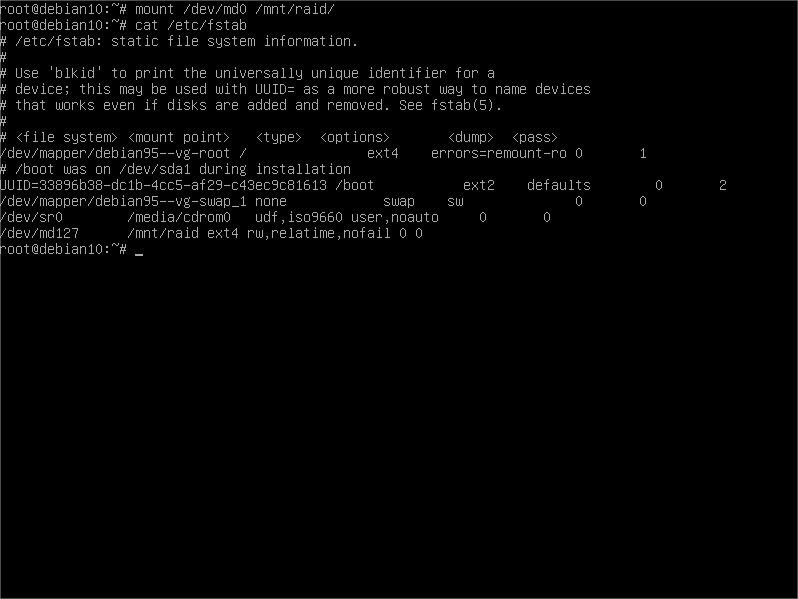
We are done. After a reboot, we will have our RAID mounted back again in the directory chosen and ready for use. Note something: I changed /dev/md0 to /dev/md127. Turns out that after the reboot Linux kernel changes the /dev/md identifier to free up the lower numbers and moves it to the higher values. It usually goes with correlative numbering but in case you want to check out the number given after the reboot:
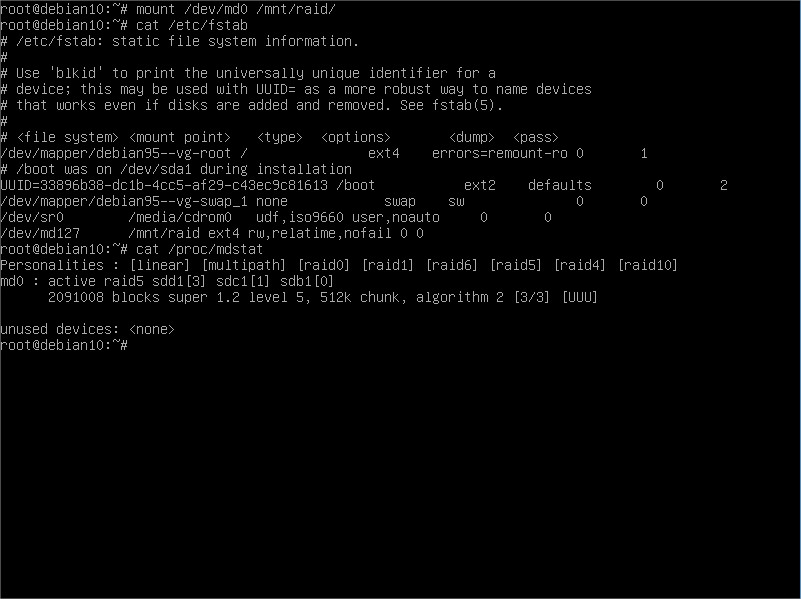
This proc filesystem summary file will give you the /dev/md number associated to the hard disks you included as RAID members. Here we see yet /dev/md0 because I did not reboot this box.
If we want to check the RAID status:
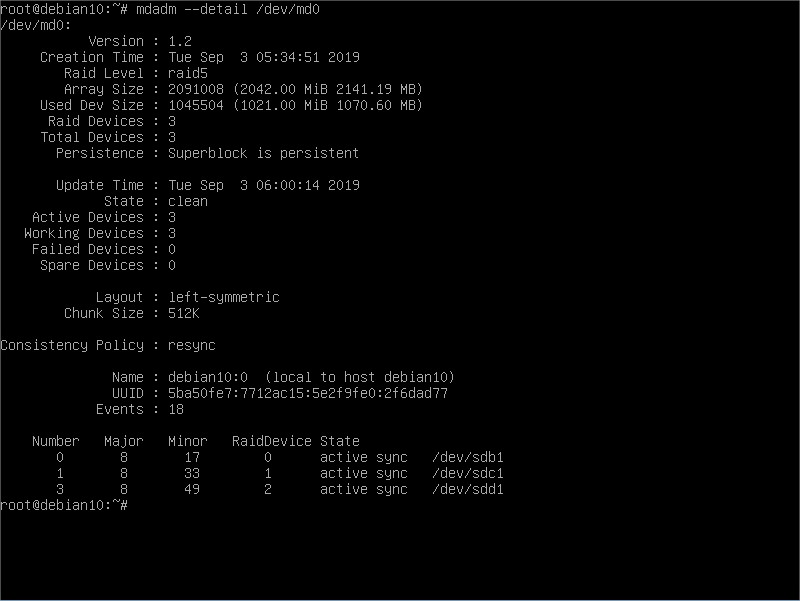
Here we have all the information related to this RAID setup. Note the State line and the disks summary down below, these will change depending on the actual status. Let’s say one disk is broken, we will see something like:
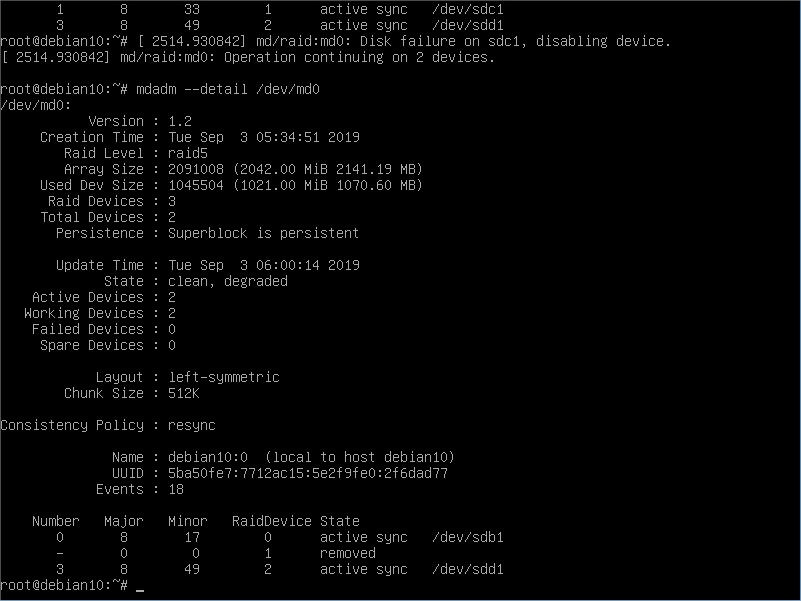
See the difference? After the dmesg saying a disk is missing, we can see in the mdadm details the new status of our RAID. Of course, replacing the disk ASAP is the best course of action. So let’s say we need to replace it. Of course we will need to go through the connect and partition creation:
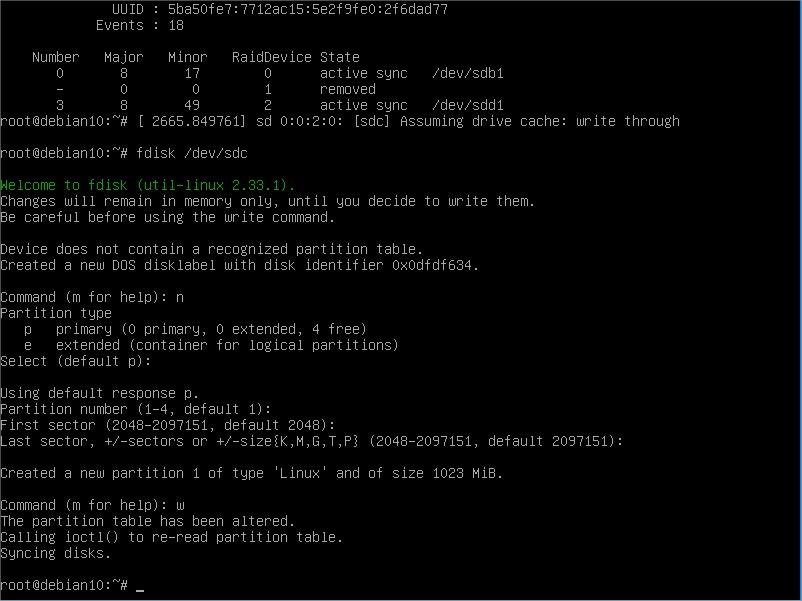
And, the HDD join to the RAID setup:
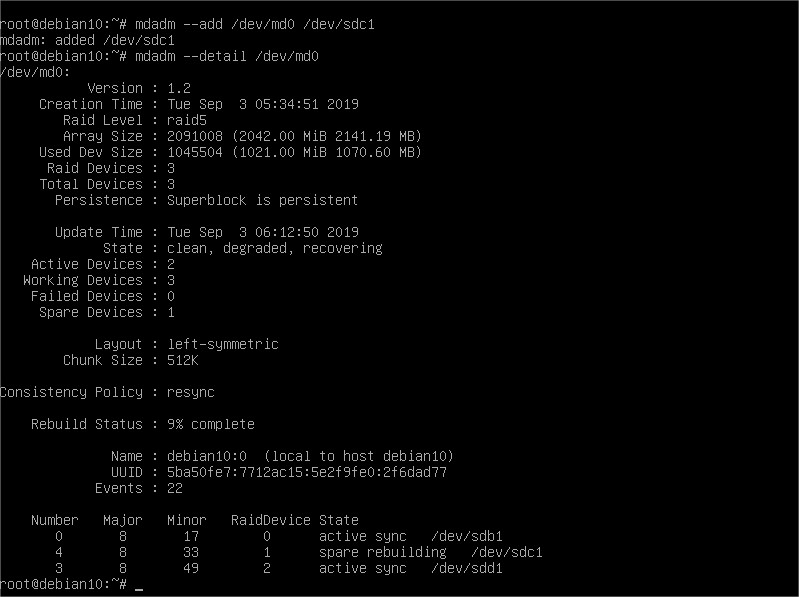
We can see that after adding this new disk to the array, it will automatically start recovering the array. Meaning so that it will calculate checksums and copy data chunks where needed to fully recover the redundancy we had before the failure.
One last note. In case of decommissioning, which means we will no longer use the array, data or the disks, a good disposal policy and procedure is recommended. We will need at least to remove the RAID and erase the superblock like so:
mdadm --stop /dev/md0
mdadm --zero-superblock /dev/sdb
mdadm --zero-superblock /dev/sdc
mdadm --zero-superblock /dev/sdd
The hardware disposal procedure is up to you. See you all!